


Recycled July 4th Crafts
/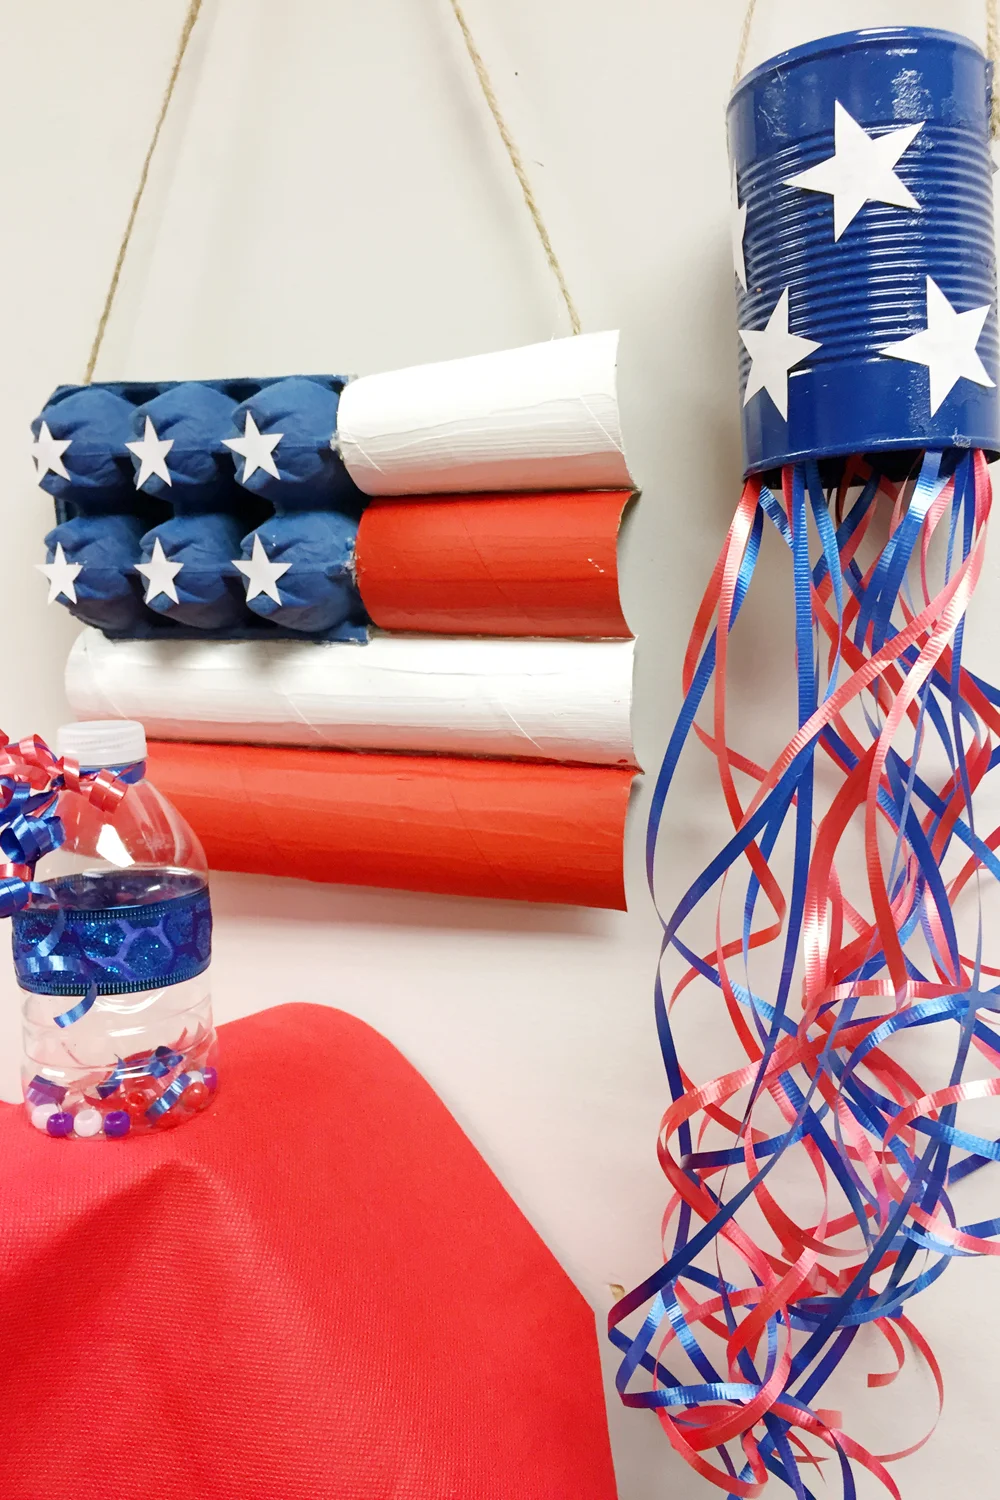
Here are several patriotic crafts sourced from things you may already have in your recycling bin at home. All just in time for July 4th celebrations.
A wonderful way to keep the kids busy during summer break is making crafts from things you may already have stashed in your recycling bin. Celebrate July 4th next week decorating your space with one of these easy kid-friendly crafts.
• Music Shaker Bottle: Transform a plastic water bottle into a noise maker or music shaker with just a few additions. You’ll need an empty, dry plastic water bottle with lid; glue; dry and uncooked beans or rice (or small pony beads); red, white, and blue ribbons, and festive stickers.
Place about 10 beans, pony beads, or a small handful of rice inside the bottle. If desired, add light weight decorative items like bits of ribbon, glitter, confetti or craft feathers. Each item will make the shaker sound differently. Experiment with the contents before securely gluing the lid on the bottle to prevent accidental spills. Do not shake the bottle until the glue dries.
Decorate the outside of the bottle by tying ribbon to the neck, and placing colorful stickers on the sides. Shake the bottle to make some noise during the fireworks, or sing a song with your homemade band.
• Paperboard Flag: Gather a paperboard egg carton for one dozen eggs, one paper towel roll paper board tube, and one toilet paper roll tube. You’ll also need red, white, and blue paint, paint brushes, hot glue gun, one sheet of white paper, scissors, and twine or ribbon.
Cut the paperboard tubes in half vertically, cutting from one opening to the other. You should end up with two curved pieces from each tube. Lay the tubes on the table horizontally with the curve facing up. Cut off the lid of the egg carton, and the tab on the side. Cut the egg carton in half, down the middle so you end up with a rectangular section with two rows of three egg cups.
Arrange the pieces in the shape of a flag by first placing the egg carton section horizontally on the table with the bottom of the egg cups facing up. To the right of the first row of egg cups lay a short paper tube horizontally with the curved side up. Place the second short tube below the first, lined up with the second row of egg cups.
Next, lay a long tube length wise, directly below the egg carton and tubes. And, lineup the remaining tube below that. You should have an overall rectangular shape flag with the carton being the area for the stars, and the horizontal tubes representing the stripes. Use the hot glue gun to glue the flag together.
Paint the carton area blue, then the top tube white, the second red, the third white, and the last one red. While waiting for that to dry, cut out six stars about one inch in size from the white paper. Glue a star at the top of each egg cup. If desired, glue twine or ribbon to the back of the flag to hang it up.
• Tin Can Windsock: Transform a soup can into a windsock you can display on the porch. To get started you’ll need a soup can, ribbons, blue and white paint, paintbrushes, hot glue gun, and twine to hang the windsock.
Remove the label and lid from the soup can (or other bi-metal can). Empty, clean, and dry soup can, then paint it blue. When that’s dry, paint some white stars on the outside of the can. Alternatively, cut star shapes out of white paper, then attach them to the can using rubber cement or craft glue.
Next, cut strands of ribbon about two feet long. If possible, use individual red, white, and blue strands, or another style of patriotic, decorative ribbon. Glue one end of each strand to the inside rim of the can using a hot glue gun. Add sufficient ribbons to go around the whole can.
Finally, attach twine to hand the windsock. Cut a length of twine about two feet long. Hot glue one end to the bottom edge of the can, and the other end to the opposite side. Another way to add the twine is to make a hole on each side of the can to thread the twine thru, then tie at the top. To make the hole use a hammer and nail. Place the nail where you want the hole, then hammer a portion of the nail thru, and remove it to reveal a small hole.