


Four Fast Reuse Projects to Organize Your Kitchen
/
Do you want to be able to walk into a clean, well-organized, and functional kitchen? Most of us do, but the cost of all the containers, organizers, and holders can quickly add up. To help cut costs there are a few quick organizational upcycles we can do n a dingle afternoon to get a step closer to our perfect kitchen. Using various plastic bottles, boxes, and a few odds and ends from around the house we can make a sink sponge holder, a decorative and useful knife block, a plastic bag dispenser, and cabinet organizers.
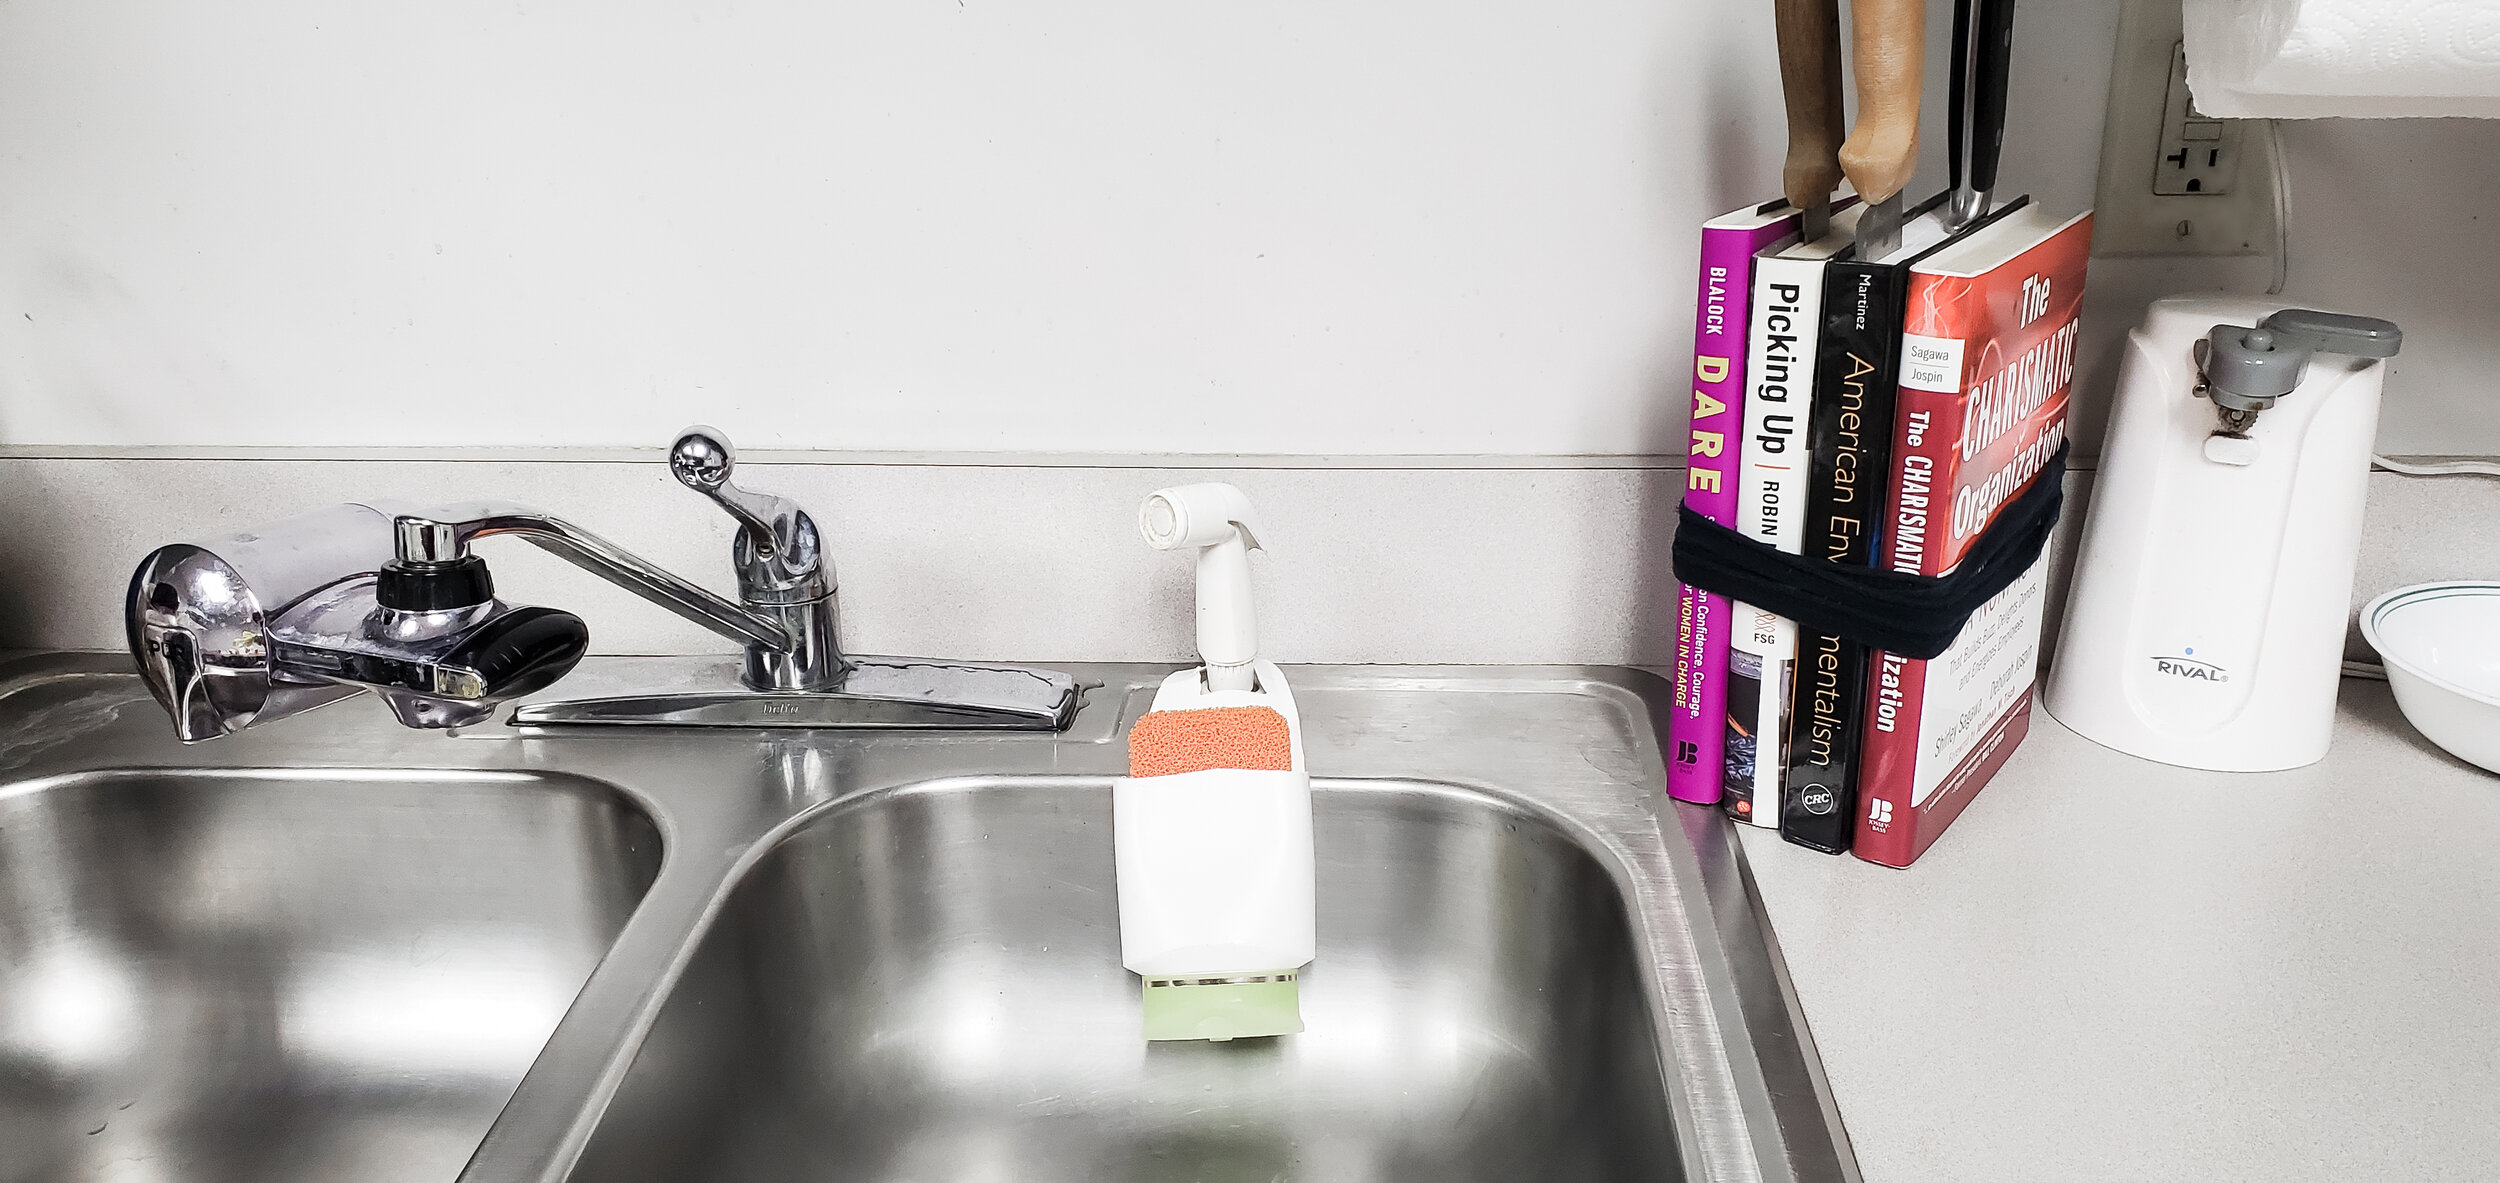
Going in order of easiest to hardest, let’s start off with making a knife block. For this project you will need three to four hardcover books you do not use, 6 large rubber bands, a hot glue gun, and 3 pieces of ribbon. Start by setting your books vertically next to them and putting them in the order you like, if any have decorative covers you may want to put those on the end. Then, about two inches from the bottom, two inches from the top, and in the middles put sets of two rubber bands around the books. Use you ribbon to cover each set of rubber bands and put a dab of hot glue on the end of each ribbon to connect it. For extra counter protection you can cut a small rectangle of plastic or chloroplast to put under the books. Now you can put your knives in a cute and useful storage instead of just laying inside a drawer haphazardly.
Next, grab an empty medium sized shampoo bottle and a pair of scissors because that’s all we’ll need for this project. Remove all labeling on your bottle first. Turn your shampoo bottle upside down and cut off or take off any lid or cap first and, then, about 4 inches above that cut out the top sides and the front. Turn your bottle around and near the top of the back panel cut a square large enough for the bottle to fit over your faucet. Place the holder over your faucet and you now have a holder for your dish sponge.
Each of us need different sizes and amounts of drawer organizers which makes making your own much more economical. To make your own, start collecting cardboard, gather a ruler and box cutter. Measure your drawer and use the dimensions to create lines on the cardboard. You’ll need to make at least two sets, one cut out the length of your drawer and one that is the width. Lay your utensils down the way you think you would like to organize them and then start placing your dividers, connecting them by cutting a thin slot 4 inches down on each divider where you need them to intersect.
After the pandemic, many of us have large stacks of grocery bags around the house now we can organize them in one place. You’ll need an empty two-liter bottle, scissors, an iron, an old cd, a hot glue gun, and ribbon. Take the two-liter bottle and remove the label. Then, take your scissors and cut around the bottle about 2 inches from the bottle top, and around the bottle about 3 inches from the bottom. Now, heat up an iron and carefully place the heated iron on each side that has been cut off to soften the sharp edges. Lastly hot glue a small piece of ribbon on a cd and on the bottle where the bottom was. This will create a hinged top to cover the bottle. Lastly, put your bags inside and hang your bottle up with the smaller opening on the bottom. If you prefer, you can decorate your creation to make it match your kitchen décor.
Each of these crafts takes minimal costs and supplies and together they can help you have a much more organized kitchen. They also help cut down on waste by reusing items that have already been used once like a cardboard box or shampoo container. By incorporating reuse into these projects, we give them a second life and keep our own costs down.
Amy Hartline is the recycling and education program coordinator for the Dalton-Whitfield Solid Waste Authority. Have a recycling question? Contact her at (706) 278-5001 or ahartline@dwswa.org.